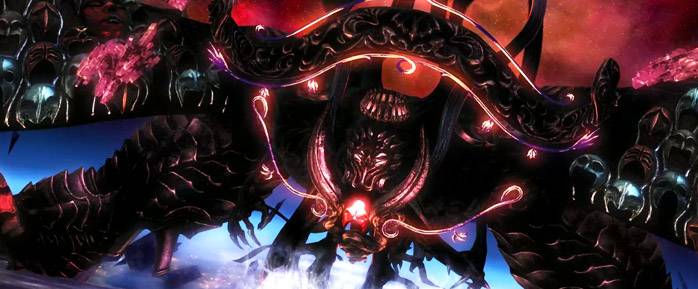
With the latest 5.1 patch in Final Fantasy XIV: Shadowbringers, we not only saw a lot of improvements to current systems, but also received a bevy of new content ranging from Beast Tribes to a phenomenally well-designed Alliance Raid. While we covered the latter, it's now to talk about the Extreme trial, Minstrel's Ballad: Hades's Elegy.
I'll try to keep spoilers to a minimum, but considering Hades' involvement in the story, you should have finished Shadowbringers before coming here. Also, knowing the fight by reading this guide or watching a video is far different than actually experiencing it. Be sure to either practice with your statics or find the plentiful prog runs that are flooding the Duty Finder during the day.

SETUP:
- In a diamond shape, place A, B, C and D markers in the middle most octagon (where the lines cross). Preferably A north, B east, C south and D west, but it's up to the leader. Alternatively, you can just put down 1 on west and 2 on east. It's easy to get turned around without some markers.
-
Assign placement of players with a 1 marker. This is where everyone will be during phase 1, and potentially phase three during a knockback.
-
DPS northeast, northwest, southeast, southwest
- I generally prefer ranged in the south and melee in the north to make things easier later on
- Main tank north, off-tank south
- Healers west and east
-
DPS northeast, northwest, southeast, southwest

Phase 1
Ancient Double: The first part isn't too different from the original fight, just now with a couple of attacks that double up. This of this if you cast Double in other Final Fantasy games.
Shadow Spread: Everyone must be in their placement here. Do not overlap otherwise you will die. When the spread hits, there will be safe spots where it didn't touch. Immediately go to that little patch to avoid death.
Bad Faith: A very easy mechanic to dodge. A wall of spikes will appear on both sides of the arena, one facing north, the other south. Simply position yourself behind the wall. Immediately after it goes off, move to the area that just got hit as Ancient Double will cast this again but in the opposite direction.
Ravenous Assault: A two-hitting tank buster. There are potentially two in this phase (depending if you get to it). It's best for the main tank to use their invulnerability ability on the first one, and if you get to the second one, have the main tank one hit, and the off tank provoke and take the second.
Arcane Attack: There are two different attacks that this can be.
- Arcane Utterance (Orbs): Explosive orbs will spawn throughout the arena with the exception of one patch somewhere. Simply find the empty slot to ensure you aren't hit and receive a debuff.
- Arcane Control (Panels): Similar to orbs, there's only one spot that's safe here. Instead, don't go to the spot that's open. Go complete opposite of it behind the panel. The best way to figure this out is that there's one panel in the middle that's aiming towards the open space. Follow behind it to the back and you'll be safe.
Broken Faith: Not a whole lot has changed here from the original fight. There's just a lot of dodging the platforms that come down from the sky. Alternatively, if your healers are up to it, you can still soak the two in the middle and generally get away with it. It really depends on your party make-up. If there's a lot of casters, this might be more ideal.
At this point, you've seen all the mechanics of the first phase. He'll repeat next with the second Arcane attack which is followed up by a Shadow Spread (remember to immediately get into your positions), Bad Faith and then Ravenous Assault. Each phase does have an enrage, so be careful. Hades will need to be at 10% to get to the next phase.

Phase 2
This is arguably the hardest section of the entire fight because it's very easy to misplace a mechanic and kill a tank, ultimately ending in a reset.
Nabriales's Shade
- He will begin to cast Quake III. I believe you can survive at around 40%, maybe even 50% with good mitigation, but if you don't get him down fast enough he will kill quite a few.
- Tanks will need to soak meteors. Main tank takes north, off-tank takes south and they move clockwise as more meteors begin to fall.
- DPS will be given a tether that needs to be aimed away from the middle and away from the tanks. This is very important as if one even clips a tank, it's game over. The cone attack that follows the tether will occur when the second meteor hits, so aim each tether towards the third or first meteor placements.
- Immediately following Quake III, the tanks will get a large AOE marker while the Healers will receive a stack-up marker. Have the tanks move away from the group (they can still be in attack range Nabrailes), while healers stack on their marker with their DPS (east and west).
Lahabrea and Igeyorhm's Shade
- These two will appear shortly after Quake III goes off and start casting a giant raid-wide attack that needs to be healed through.
-
Everyone will be given a debuff, either ice or fire:
- Fire debuff: Attack Igeyorhm
- Ice debuff: Attack Lahabrea
- Tanks will need to pick up their respective enemy and move them away from one another.
- Four shades will spawn, two north, two south. There are a couple of different strategies for this, but the best is tanks pick up the northern tethers (opposite of their debuff) while healers go south and pick up the other two tethers.
-
To get a jump on tethers:
- Southwest Shade is Fire
- Southeast Shade is Ice
- Northwest Shade is Ice
- Northeast Shade is Fire
- During all this, the tanks will be hit with tankbusters (Blizzard IV and Fire IV), so healers will have to keep their health up while grabbing the tethers.
- The only other mechanic is the two will recast Fire and Ice Sphere, and will swap your debuffs, so tanks especially need to get ready to swap targets with Provoke.
Ascian Prime's Shade
-
This is what some have trouble with. Prime will begin to cast Universal Manipulation which will do incredible damage to everyone and put numerous debuffs on players. Healers have to get ready on this one.
-
Tanks & Healers:
- Doom: Healers will need to top up their own and the tanks' HP to get rid of it.
- Ancient Circle: Giant ring AOES. This looks very intimating but fairly easy to understand.
- Cursed Shriek: Petrification wherever you look. This happens last, so simply look outward after DPS knockback.
-
DPS
- Beyond Death: You will need to die to get rid of this, which is where Ancient Circles come into place.
- Off-Balance: Any damage will send you flying backwards.
- Forked Lightning: A blast of lightning that will cause paralysis on anyone around them (that can't be dispelled).
-
Tanks & Healers:
- So first off, have your healers and tanks stand on their markers and a DPS on the outside of them. You can assign them however you please, but continuing with the theme of this fight, we moved them clockwise, so the northeastern DPS should go behind the eastern healer, while the southeastern DPS should go behind the off-tank in the south, and so forth.
- When the Ancient Circles pop up, don't panic. Have the one DPS stand in the closest ring behind your assigned healer or tank, all while maintaining damage output.
- You will need to drop to 1 HP too get rid of Beyond Death, otherwise it will take your HP down to 0. This will do just that, and push you back, ensuring your Forked Lightning won't paralyze anyone (unless you're a Red Mage or Samurai who seem to like to use Corps-a-corps and Hissatsu: Gyoten -- please wait a moment before doing this, especially if you're behind a healer).
- Also, Cursed Shriek (Petrification) will go off immediately after DPS are pushed back, so make sure everyone is looking outward (including DPS).
- Blight will be Ascian Prime Shade's immediate attack after that frightening list of mechanics, doing decent raid-wide damage, so healers, hopefully you've topped up the DPS by this time.
- Height of Chaos will follow, which is a tank-buster cleave, so no one should be next to the main tank.
- Megiddo Flame will be next, which is a line stack. DPS once again go to either their east or western spots, while the tanks will circle clockwise; so main tank east, off-tank west. Mitigate, heal and continue.
- Shadow Flare is a heavy raid-wide attack that will occur immediately after, and if you're DPS is lacking, it will also be the name of the enrage later.
Congratulations! You've successfully (I hope) made it through Phase two. This makes the next two phases look like a stroll in the park, but that's just because there's a lot of mechanics that can insta-kill anyone not in the right position. Back to Hades!

Phase 3
Again the Majestic: This will do two things. Firstly, it will summon comets on the north and southern parts of the arena. Just like everything in this raid, have tanks move clockwise and soak them. Additionally, this will target one healer who needs to move out of the group. This will grab them and trap anyone in the AOE in an "Aetherial Gaol" that will kill them if DPS is slow.
Again the Martyr: This is a mechanic I've seen lots of farm parties even have some trouble with as it looks like a whole mess that's going on. Healers will get a stack marker while DPS have an ice AOE.
- Have the healer place themselves in between the middle and their marker.
- Have the tank stand to their side very close to them.
- Have their north and south DPS stand north and south of them (preferably south will be ranged).
- Hades will knock everyone back (Wail of the Lost), with the tanks and healers taking the stack, with the DPS flying outward and resolving their ice AOE outside of the healer's range.
Again the Abyssal Celebrant: There will be six line AOEs that's similar to Shadow Spread going out, along with line stack on the healers.
- A healer will need to stack with their tank and their northern DPS for this as they'll be hit three times. Go to the furthest northwest or northeast (depending which side you're one) and get into that safe zone.
- The two southern DPS (preferably ranged), will be auto-targeted with bleed puddles. Think Proto Ozma from Baldesion Arsenal, except for dispelling it, they will leave a trail of bleed pools wherever they run. Start right at the back and take them up the two lanes that the healers are not in (closest to the middle).
- Like most of this fight, it looks intimidating, but it's very easy, provided Again Martyr is done correctly.
Dark Seal: He will place two expanding orbs on the platform, one east, one west. Make not which is closest north. You want nothing to do with that side.
Two Attacks: At this point you should stack in the north and as the orbs are expanding, he'll cast both of these attacks consecutively, so get ready to move.
- Shadow Stream: This will hit right down the middle of the arena. Either go northeast or northwest depending which orb is furthest back.
- Polydegmon's Purgation: This will hit the sides of the arena. Hug Hades' stomach in the northern center.
This will happen twice before Hades begins to cast his enrage. You need to bring his health down to 30% to move onto phase 4. You will also need to button mash in an "Active Time Maneuver" to get out of Hades' hold.

Phase 4
Welcome to the final and by far the easiest phase. This is a healer-heavy portion, so hopefully they're on their game.
Dark Current: Hades will summon exaflares from both sides of the room. Don't panic as there are three easy steps in not getting hit once.
- On the right side of the arena, go below or above an exaflare.
- When the exaflare below or above you goes off, move behind it.
- There will now be one below you. When that goes off, get behind it.
Essentially move up, then down, then up again to remain in a safe spot.
Gigantomachy: A massive raid-wide attack, bringing all but tank's health generally below 50%.
Quadrastrike: This is a nasty combo. It starts with two raid-wide hits followed up by two towers that tanks need to soak. Finally, Hades will unleash another raid-wide attack that (hopefully) your healers have gotten everybody's health back as this also hits for more than 50% HP, not to mention adds a bleed effect.
Hades will then do the same attack combo again, Dark Current, Gigantomachy and Quadrastrike. After this point, he will begin to cast his enrage of Gigantomachy. I've wiped at 1% before, where Hades' health was at around a quarter when he started casting.
And there you have it. Enjoy the two totems, and hopefully you get the weapon you've been looking for, the Faded Copy of Invincible, Hades's Auracite (for crafting a trophy or barding) and of course the new Dragon mount.