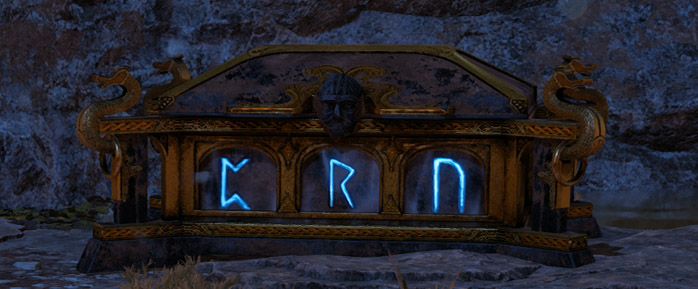
Kratos is strong, but he’s still going to need to get even stronger if he wants a chance at surviving Ragnarok. Fortunately, the Norns have scattered plenty of health and rage upgrades around the nine realms. Unfortunately, they’ve chosen to hide them within rune-locked chests, some of which are themselves hidden in out of the way places. Here’s where to find them all.
Svartalfheim
[gallery columns="2" link="file" size="medium" ids="429744,429745"]
1. Aurvangr Wetlands: on a water-level rock ledge
Method: Destroy the seals
- A. Right of the chest.
- B. Behind the chest, on a rock in the water.
- C. Behind a tree on the ledge in front of the chest
2. Aurvangr Wetlands: sitting against a rock wall in plain sight.
Method: Spin the spinners
- A. Behind the geyser to the right of the chest.
- B. Up the ledge to the left of the chest, on the pillar to the right.
- C. Through the tunnel to the left of the chest, on the right.
3. Dragon Beach: At the back of the beach
Method: Destroy the seals
- A. Behind the geyser to the left of the chest.
- B. Behind geyser to the right of the glowing runes. Go around the rocks to the right and hit it from behind.
- C. On the beach, behind the geyser to the left of your boat.
4. Radsvinn's Rig: In plain sight.
Method: Light the torches
- A. Next to chest, on the left.
- B. To the right of rig platform entrance behind metal bars. Throw axe at pot behind it from elevated platform to its right.
- C. Behind 2 barrels to right of chest. Break with sonic arrows.
5. Alberich Island: on beach right of boat.
Method: Ring the bells
- A. Behind chest to the right.
- B. At back of beach to the left, raised by adjacent spinner.
- C. Front of beach, left of boat, on a crane. break crane with a sonic arrow.Order: 2, 3, 1
6. The Forge: Get off train, follow walkway, take right fork, climb small ledge on right, bear right.
Method: Detonation
- A. Directly ahead of ledge left of chest.
- B. Cliff face directly across from chest.
- C. On rock outcropping to the right of blocked wooden ramp.
7. Jarnsmida Pitmines: Found immediately after grappling over big cargo container.
Method: Light the torches
- A. Right next to chest, on it's left.
- B. Drop down ledge to left, found at end of path.
- C. West of B, unfreeze cargo and grapple across to access.
8. Myrkyr Tunnels: Along the story path, can't miss it.
Method: Light the torches.
- A. To the right of the chest. Light by breaking alcohol barrel at the back with axe, firing sigil arrows at right side wall to touch the puddle, then igniting it with Kratos' blades.
- B. In front of the chest, in the tunnel you came from.
- C. A little further into the tunnel you came from, behind some boxes on the north side.
9. The Applecore: in the Sverd sands lift chamber.
Method: Detonation
- A. South of chest, up two ledges.
- B. West of chest in the wall.
- C. West of chest in the wall.
10. The Applecore: From Sindri's shop, go up the ramp and cross the bridge until you come to a fork with debris on the right. Go left a little, turn around throw the axe at a red pot to clear the debris. Go down right path clear the enemies. Grapple over the gap to the left, climb up. Open the doors on the left, turn left, look over water and see a (late game gear) spot. Cross it and look to the right for the chest.
Method: Detonation
- A. Near the Mystic Gateway.
- B. Behind some debris down the path to the right.
- C. East of the chest, across the room.
[gallery link="file" size="medium" ids="429808,429809,429810,429811,429812,429813,429814,429815,429816,429823,429824,429825,429800,429801,429802,429826,429827,429828,429817,429818,429819,429820,429821,429822,429803,429804,429805,429806,429807"]
Alfheim
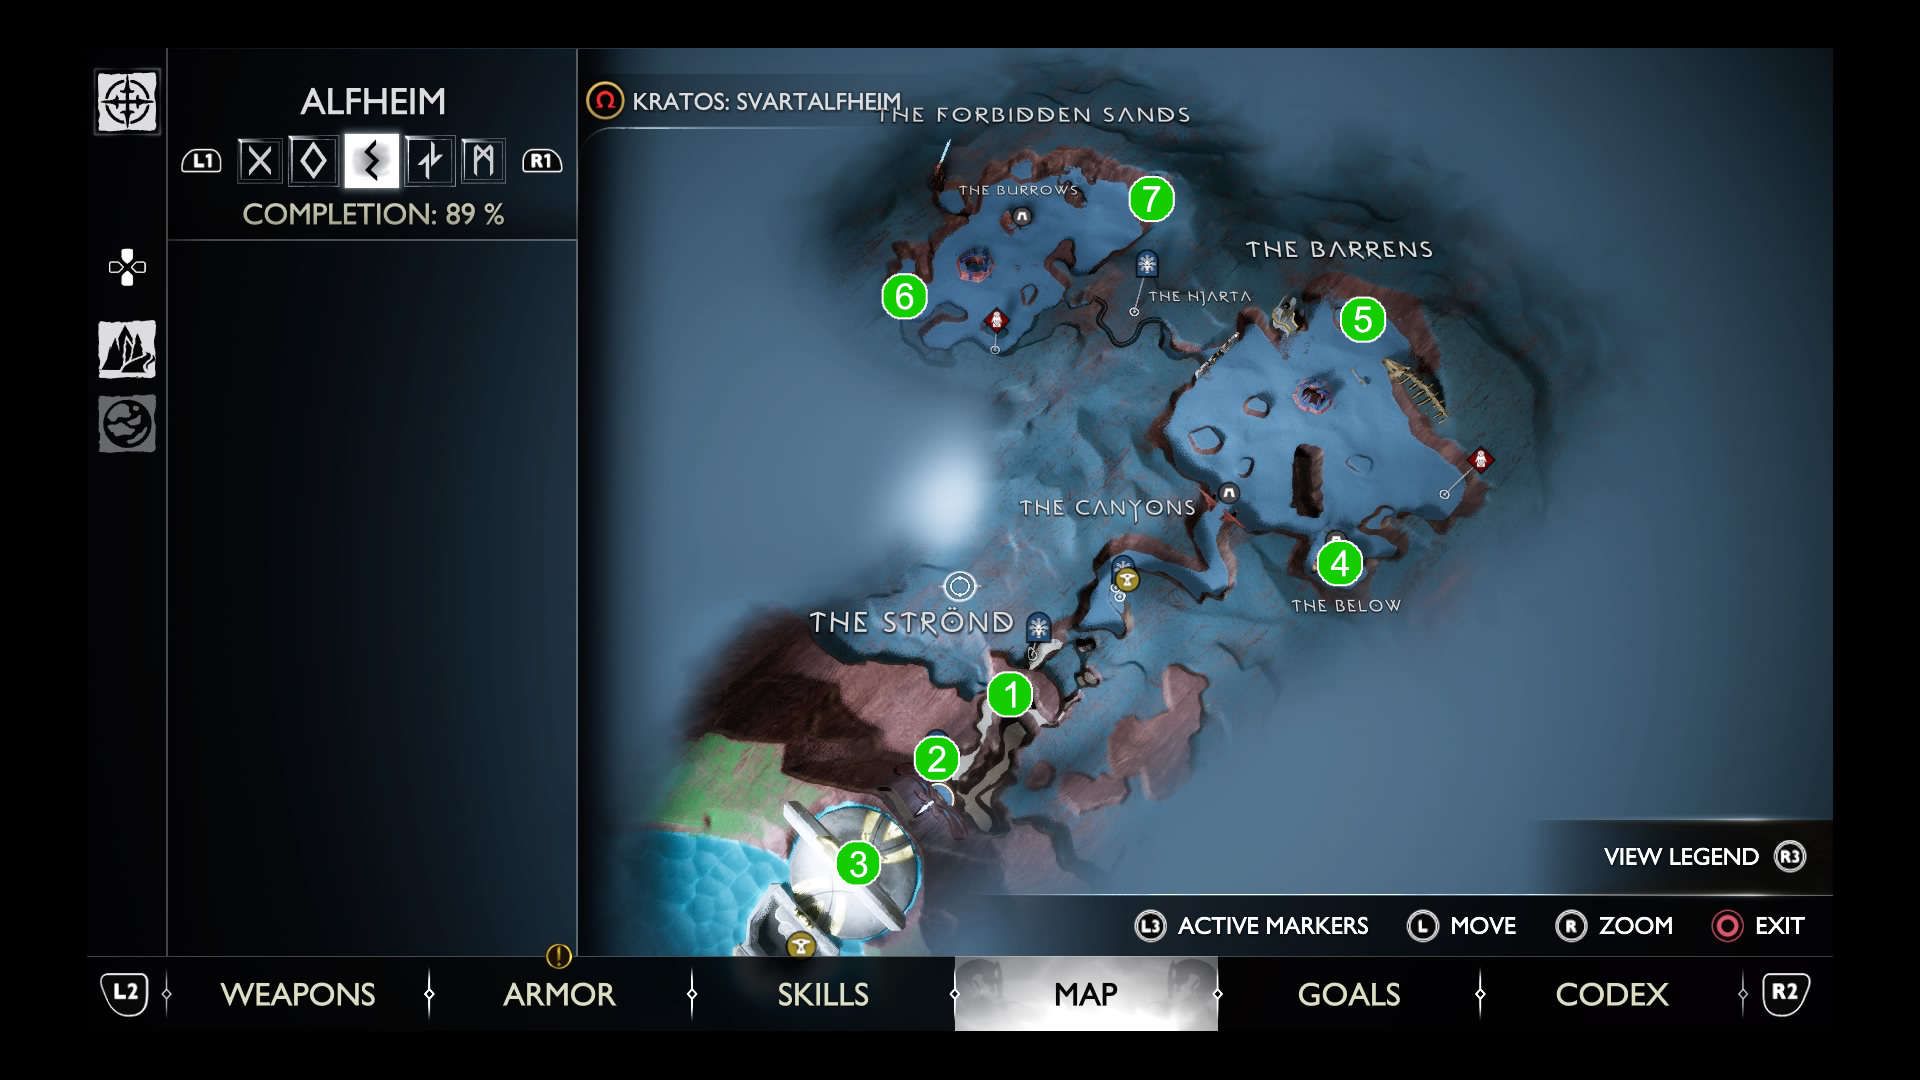
1. The Strond: After exiting the crawl space, go left and drop down.
Method: Light the torches.
- A. Northeast of the chest
- B. South of chest. Look down from ledge
- C. South of chest, look up. Climb up ledge you dropped down from, go left, climb 2 ledges and turn left at top. Look down.
2. The Strond: After 1st elf encounter, walk until the fallen pillar, after that hug the wall on the left. Chest is straight ahead.
Method: Detonation
- A. Near chest, to the northeast. The direction you came from
- B. On raised ledge directly across from chest to the east.
- C. On western side of chasm after the chest.
3. Temple of Light: Found immediately after Kratos and Tyr knock over pillars to create a light bridge. Sitting to right of bridge.
Method: Ring the bells
- A. Right behind the chest.
- B. same wall as A. Look for a lit ledge.
- C. Down hall to the right of chest, covered by green ore. Shoot ore to clear. Stand at chest and bounce axe of twilight stone to hit.Order: C, B, A
4. The Below: Found outside first major combat room. Zipline across chasm. Follow path. Grapple across, drop down, kill enemies, there it is. Open wooden gate in front of it. Method: ring the bells
- A. Across from chest, elevated.
- B. On the other side of the gate you just opened on the left.
- C. Destroy red sacks the grapple along new path, it in the window of the building.Order: C,B,A
5. The Barrens: Ruin in the north, clear the webbing and storm first.
Method: Light the torches
- A. Next to the chest.
- B. Other side of ruin.
- C. Top of ruin, hit pot with axe to light it.
6. The Forbidden Sands: At the the northern edge of the area.
Method: Light the torches
- A. Near chest.
- B. On a pillar outside chest's immediate space.
- C. Also outside, high up in crevice. Use sigil arrows to make a line to it.
7. The Forbidden Sands: In a tunnel underneath the Elven Library in the NW.
Method: Light the torches
- A. On a ledge to the left of the chest.
- B. Back up the path a bit and look south, it's on a ledge next to a pillar.
- C. In a web shutter above B. Open with sonic arrows.
[gallery link="file" size="medium" ids="429840,429841,429842,429843,429844,429845,429846,429847,429848,429850,429851,429852,429831,429832,429833,429834,429835,429836,429837,429838,429839"]
Midgard
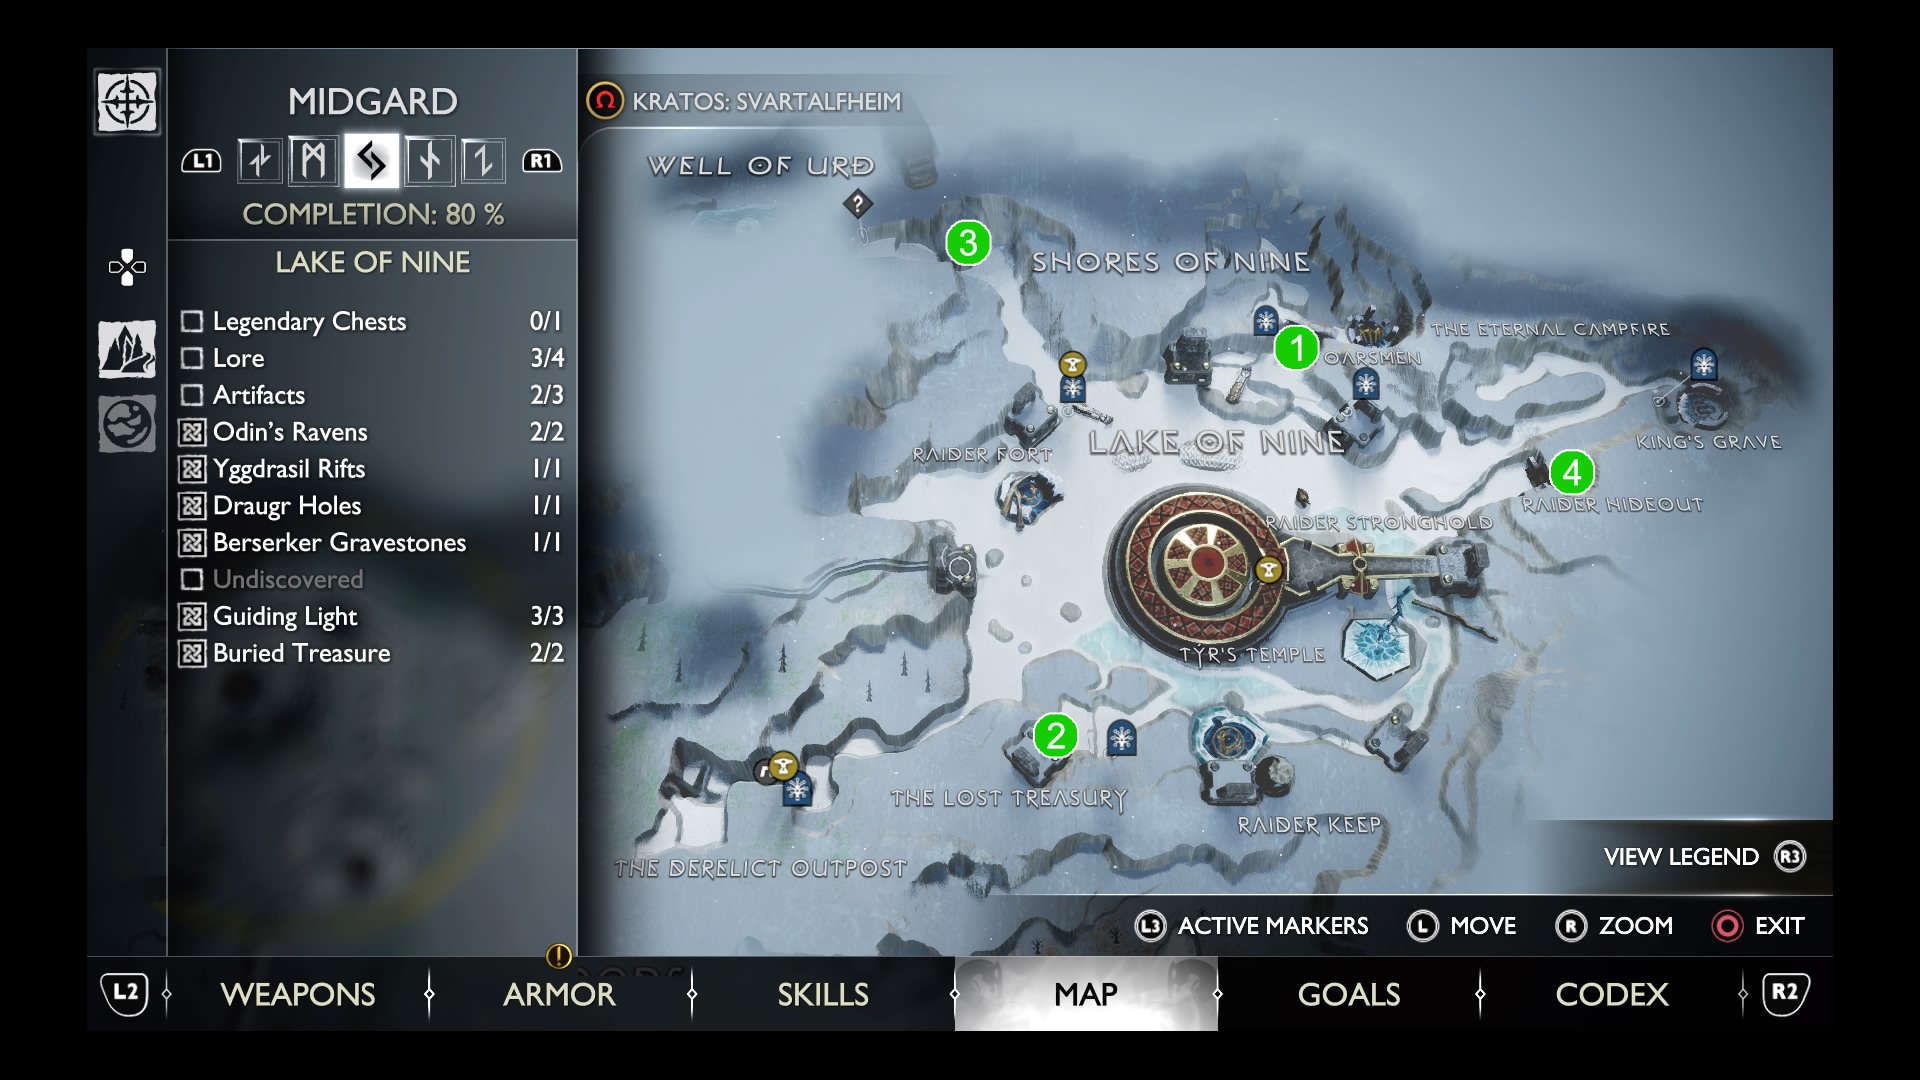
1. The Oarsmen: At the back-right wall upon entering the underground tomb.
Method: Ring the bells.
- A. Left of the chest, in a cave.
- B. South side of the room, across a pit.
- C. Behind a gate to the right of the chest. Clear the area to reach the other side of the gate. Order: A, B, C
2. The Lost Treasury: To the left upon approaching the shield gate.
Method: Light the torches.
- A. Behind the shield. Shift shield left to access.
- B. On top of the structure.
- C. Inside the gate room. Use chains and sigil arrows to light it.
3. Shores of Nine: At the end of the path found at the NW of the lake.
Method: Light the torches.
- A. To the left of the first climbing wall.
- B. Above the chest. Access by climbing all the way up, the walk the ledge to the left and drop down one level.
- C. At the top of the cliff you just climbed, to the south.
4. Raider's Hideout: Found at the northeast corner of room.
Method: light the torches
- A. Left of the chest behind some brambles, shoot runic arrows along the wall to the left and ignite with blades to light it
- B. Right of the chest in a hole. Throw a bomb to light it.
- C. In a hole across a chasm in the SE area of the room. Shoot runic arrows up the pillar and throw a bomb at them to light it.
[gallery link="file" size="medium" ids="429856,429857,429858,429865,429866,429867,429862,429863,429864,429859,429860,429861"]
Vanaheim
[gallery link="file" columns="2" size="medium" ids="429765,429766"]
1. The Southern Wilds: Found along the story path.
Method: Spin the spinners
- A. East of chest, on a rock, covered in brambles. Burn them off.
- B. SW of chest, way up on a ledge.
- C. East, SE of chest, near the tunnel used to enter the area. Burn brambles to reveal it.
2. The Abandoned Village: after solving the bridge puzzle, cross then turn around and descend into the clearing. The chest is under the bridge.
Method: Light the torches.
- A. Lit when the hanging torch is freed as part of the puzzle.
- B. Directly in front of the chest.
- C. To the left of the bridge in the tree roots. Light it by flinging the hanging torch into it.
3. The Cliffside Ruins: After landing at the region, complete the combat encounter and proceed west to see the chest.
Method: Spin the spinners.
To get an angle on spinners and release chain, climb up the wall with the torch on it to the SE and jump across the pillars. To release the chain, jump to 3rd pillar, face chain wall, notice brambles. Shoot sigil arrows along the wall to create a line to the point closest to Kratos and light with his blades.
- A. To the South, beneath the hanging chain.
- B. Along riverside, throw axe from the shore in front of Brok's shop.
- C. To the right of the chest around the cliffside, burn away the brambles with sigil arrows and Blades to reveal it.
4. The Veiled Passage: After opening the rock pathway past the waterfalls (opened via the sigil lock accessed via the hanging chain in the cliffside Ruins), proceed south until you see an opening along the right side, enter and follow it into the Veiled Passage region. Chest is on the landing to the right.
Method: Ring the bells.
- A. On the opposite wall with nothing covering it
- B. On the opposite wall, covered by brambles; uncover with a sigil arrow and bomb.
- C. On the opposite wall, behind bars.
Ring all three at once by putting sigil bubbles on each bell (one bubble is enough to cover A and B) and putting a third sigil in the center. Throw a bomb at the center sigil to ensure that all ring at once.
5. Goddess Falls: from the shore, head north to the climbable wall. Climb up, grapple across, climb 2nd wall and look NW. The chest is at the back corner in front of the cliff.
Method: Light the torches.
- A. Immediately to the right of the chest. Light by shooting sigil bubbles on the stones between it and Kratos
- B. South of the chest, across the clearing on a raised ledge. Light by shooting sigil bubbles along the stone wall between it and Kratos.
- C. On top of the waterfall at the western edge of the clearing. Light by putting sigil bubbles up the cliff face to the right and one on the torch. Stack shots on each to get the bubbles to overlap.
6. Eastern Barri Woods: upon emerging from the tunnel created by blowing up a rock wall, proceed along the path to the left. Keep left at the fork, it just up some stairs.
Method: Spin the Spinners.
- A. Left of the chest
- B. Back along the path you came from, to the right.
- C. Further along the path from the chest. On the opposite hill
7. The Plains: East of the lightning bolt, in front of a wall near the Plains' day/night altar.
Method: Ring the Bells
- A. Left of the chest.
- B. Behind the chest and slightly to the right.
- C. On the rock behind the chest. Hit it from the wall. Solution: A, B, then C.
8. The Plains: In the clearing sealed by the Seidr post. Access it by freezing the post from the clearing guarded by the Traveler next door.
Method: Destroy the seals.
- A. Behind the tree that's behind the chest.
- B. In the tree that's east of the entrance.
- C. On the rock wall west of the chest.
9. The Sinkhole: after riding the zipline down, turn around and head into the second cave on the right.
Method: Ring the Bells
- A. On the wall above the cave. Light it by using a sigil arrow trail.
- B. Outside the cave, raised up on the rock wall. Light it by using a sigil arrow trail.
- C. Left of the chest. Initially in accessible due to a metal gate blocking the way. Find a way into the room behind the gate and defeat the monster to open the gate. Light the torch with sigil arrows and blades.
10. The Jungle: Near the Day/Night Altar.
Method: Spin the Spinners.
- A. Right of the chest.
- B. Above the Day/NIght Altar.
- C. Just east of the Day/Night Altar, behind some brambles.
11. The Sinkholes: As Kratos pursues this area's dragon, he will encounter this chest just after collapsing a tunnel in order to avoid it's flame breath. Note: the dam in The Jungle region must be opened in order to reach this area.
Method: Detonation
- A. Left of the chest.
- B. Right of the chest on top of a tall column.
- C. North of the chest near the tunnel you came from, on a rock ledge.
[gallery link="file" size="medium" ids="429794,429795,429796,429768,429769,429770,429771,429772,429798,429797,429776,429777,429778,429773,429774,429775,429782,429783,429784,429785,429786,429787,429788,429789,429790,429779,429780,429781,429791,429792,429793"]
Muspelheim
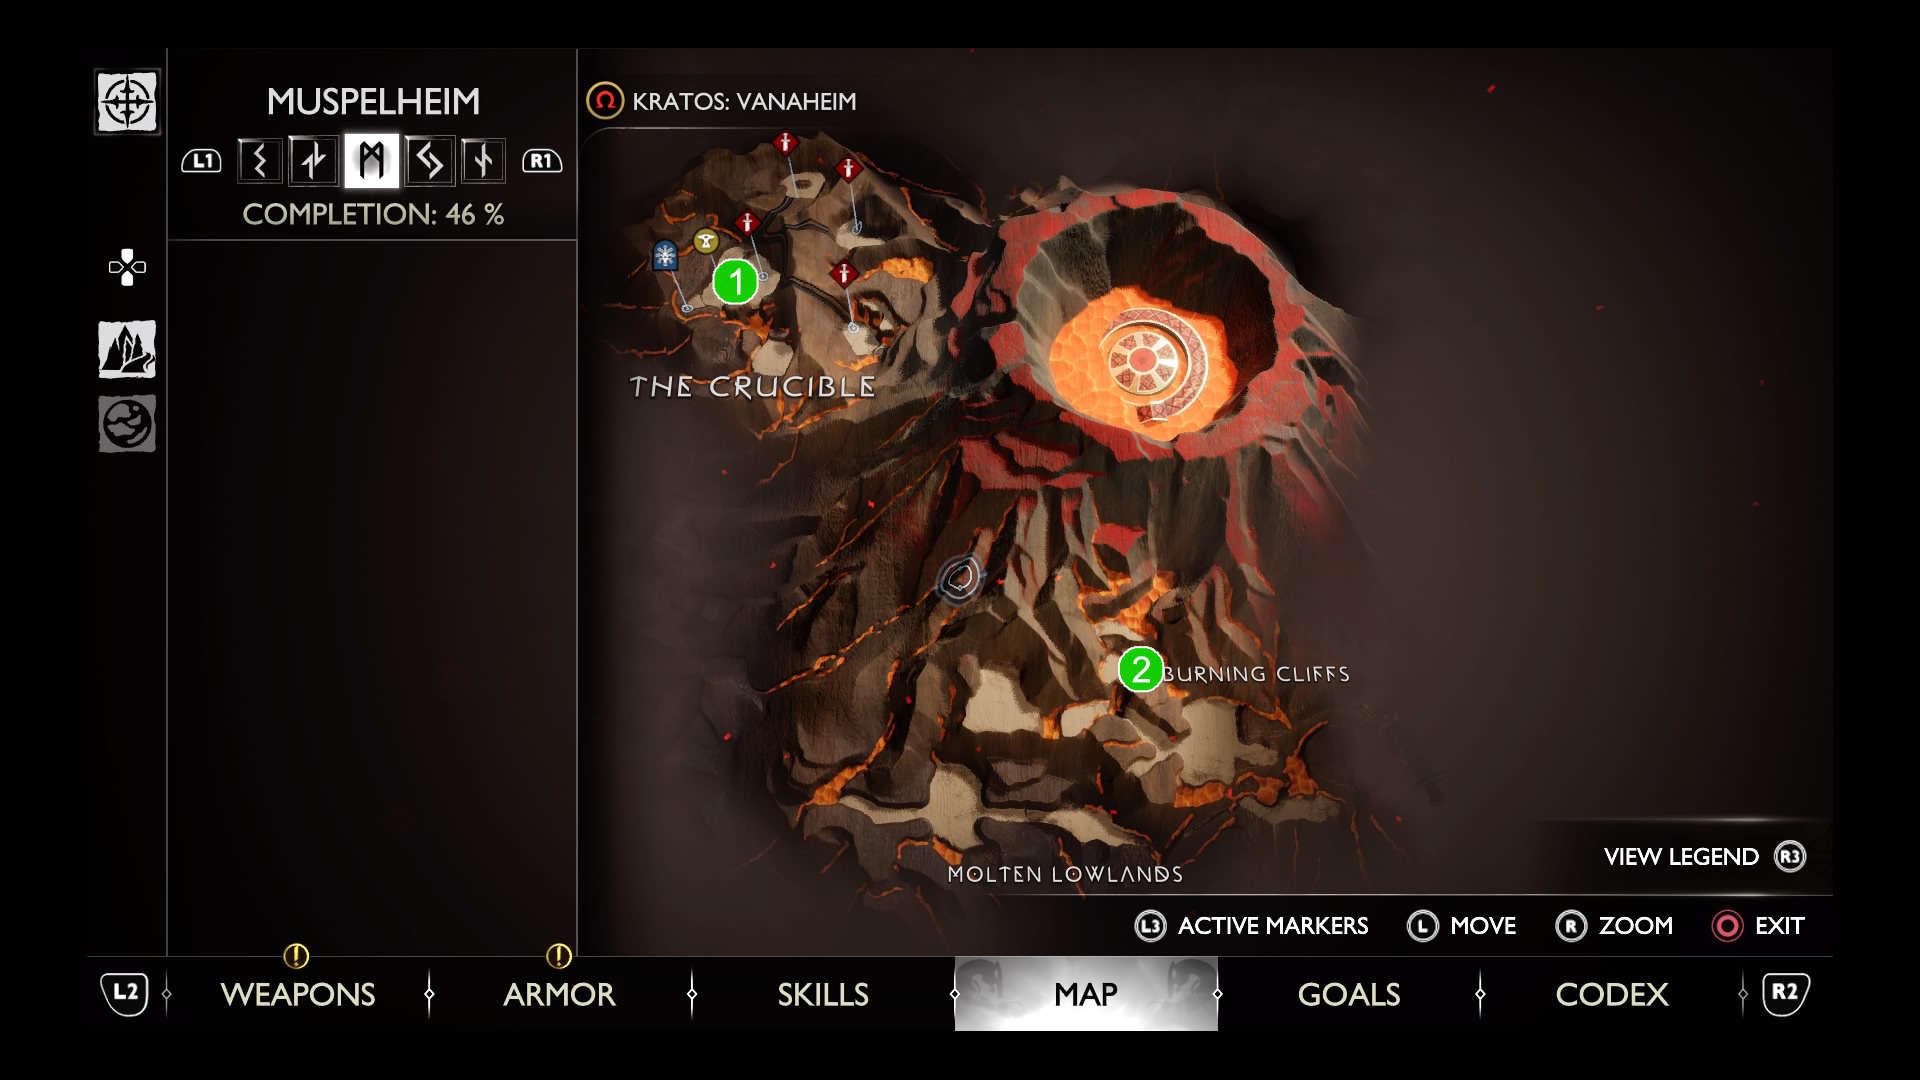
1. The Crucible: In the pit directly in front of Brok’s shop.
Method: Clear the Trials
A, B and C: Clear the trials to activate.
2. The Burning Cliffs: Along the critical path past a chasm that requires Kratos to shimmy across. On the right, there's a boulder that can be destroyed using late game gear. Destroy it to reach the chest.
Method: Light the torches.
- A. To the left of the chest, on a rock pillar across a small lava pond. Return to the destroyed boulder and face the torch. Fire sigil arrows across the three pillars to reach it.
- B. To the left of the chest, on a rock pillar across a small lava pond and to the right of A. From the chest fire sigil arrows leading to B along the pillars. Torch A must be part of the chain.
- C. Up and to the right of the chest, within reach.
[gallery link="file" columns="2" size="medium" ids="429870,429872,429869,429871"]


